
In the world of machinery and equipment, ensuring a secure connection between shafts and components is of paramount importance. This is where locking assemblies come into play. Locking assemblies are indispensable devices used to secure belts, sprockets, and various other components to a shaft. They are particularly valuable for small shafts that cannot be connected using conventional key/slot mechanisms. In this article, we’ll delve into the world of locking assemblies and provide a comprehensive guide on their general installation.
Understanding Locking Assemblies
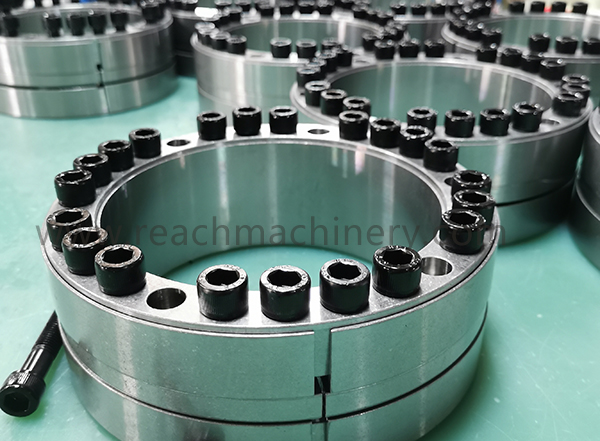
Locking assemblies work on a simple yet highly effective principle. By tightening the connection screws, these assemblies create a powerful grip on the shaft, ensuring that your components stay firmly in place. This is achieved through the interaction of two anti-conical components: the outer ring and the inner ring. When the connection screws are tightened, the diameter of the outer ring increases, while the diameter of the inner ring decreases. This ingenious mechanism guarantees a snug fit for your components, making installation and removal a breeze.
General Installation Instructions
Proper installation of a locking assembly is crucial for the optimal performance of your equipment. Here, we provide a step-by-step guide to ensure a successful installation:
1. Prepare the Surfaces
Before you begin, it’s essential to prepare the contact surfaces of the shaft, wheel hub, and locking assembly. Clean and degrease these surfaces thoroughly to ensure a solid connection. Additionally, make sure to lubricate the inner cone clamping element. Most locking assemblies come pre-lubricated, but it’s vital to note that you should not use grease or oil containing molybdenum or high-pressure additives.
2. Loosen the Clamping Screws
Start by manually loosening all clamping screws in a transverse order, turning them several times. This will ensure that they are ready for the next steps.
3. Begin the Installation
Remove some of the clamping screws and thread them into the removal threads until all of the screws are occupied. Tighten them until the inner and outer rings start to separate.
4. Insert the Locking Assembly
Now, insert the locking assembly into the hub that you intend to install. Push the assembly onto the shaft.
5. Realign and Position
Remove the screw from the removal thread and put it back onto the mounting thread. Manually tighten the screws in a lateral manner to align and position the components properly.
6. Torque Application
In a clockwise direction, begin tightening the mounting bolt to approximately half the specified tightening torque found in the catalog. After this, progressively increase the torque to the maximum specification, continually turning in a clockwise direction.
7. Final Checks
Your tightening procedure is complete when none of the screws turn according to the specified tightening torque. This indicates that the locking assembly is firmly in place, ensuring a secure and reliable connection between the shaft and your components.
In conclusion, locking assemblies are invaluable in machinery and equipment applications, providing a robust and dependable way to secure components to a shaft. By following these general installation instructions, you can optimize the performance of your equipment and ensure its reliability for years to come. Proper installation is the key to unlocking the potential of your machinery, making locking assemblies an essential component in the world of engineering and manufacturing.
Post time: Oct-10-2023